Client Portal Overview
Orion Client Portal Overview
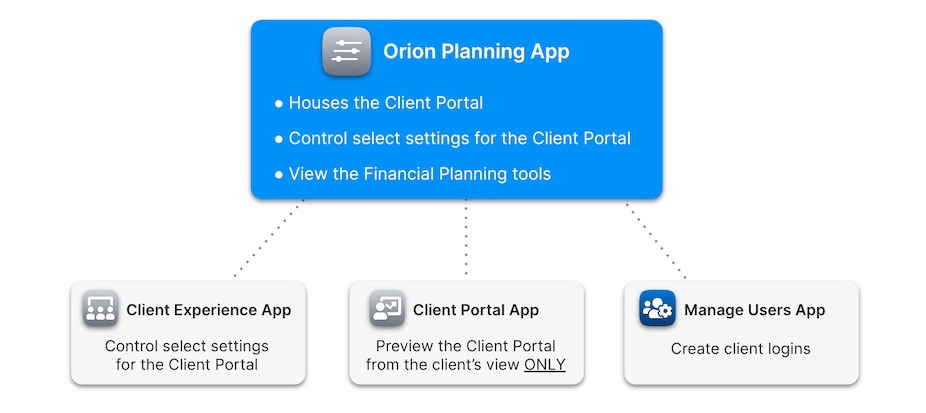
First, it’s essential to understand how all three components function both together and separately. The Orion Planning Application includes both the Client Portal and Financial Planning tools. However, these two features operate independently. By default, the Financial Planning tools are turned off and must be enabled separately. Feel free to watch the Orion Client Portal Overview and Demo video to learn more!
Enabling the Orion Client Portal via Integrations App
- Navigate to the Integrations app and locate the Orion Planning tile. Click Add.
- Follow the prompts to review the terms & conditions and set the appropriate user permissions for your firm.
- Once completed, click Finish.
The Orion Client Portal is now active for your firm and accessible to users you granted permissions to within the Integrations app. To access the portal:
- Return to your dashboard and click on the Orion Planning tile. (It may take 15-20 minutes to setup and be accessible within Orion)
- Note: You will not initially see any households in the portal until they are added or synced.
Linking a Household to the Portal
Next Link from the Portfolio View inside the Dashboard
- To link a household from the Dashboard, open the Portfolio View at the top of the page.
- Search for the household and select them from the dropdown menu
- Click the triple dot menu on the upper right corner of the page.
- From the dropdown, select Orion Planning
- If this client is already created in Orion Planning, search for their name and select Link.
OR
- If this client has not been created in Orion Planning, select Add as a new client and complete the initial onboarding steps.
Portal Customization
Updating Custom URL, Logo, and Contact Information within the Client Experience App
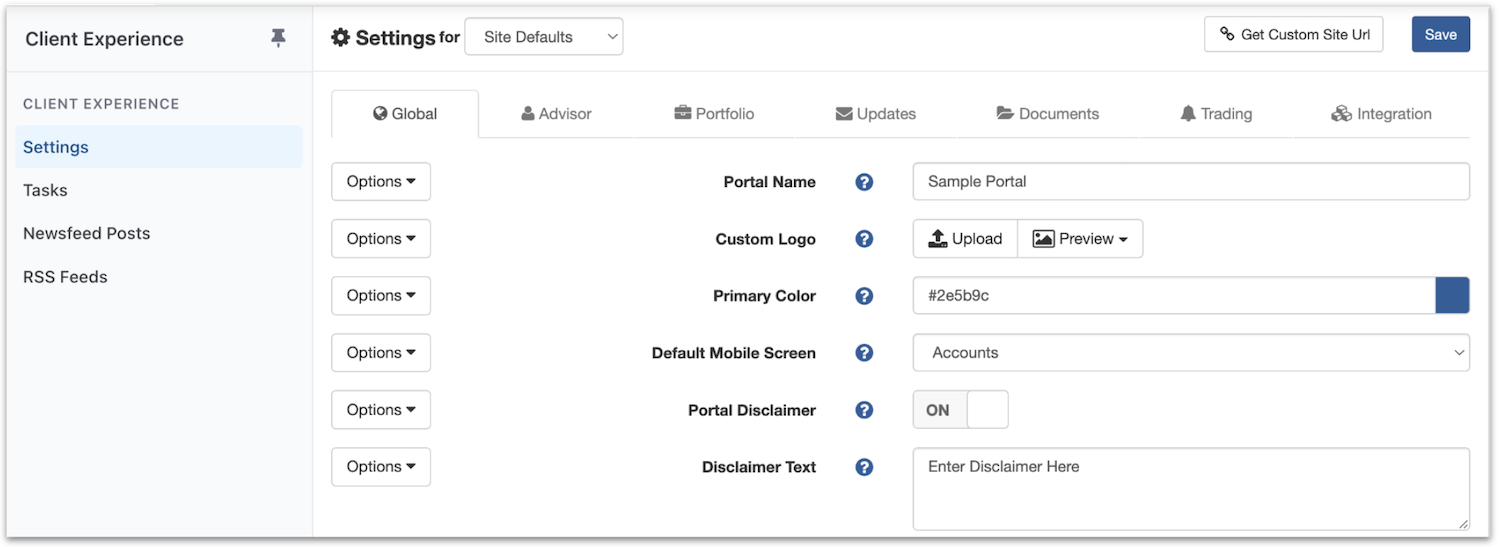
Custom Logo:
- Click “settings” on the left side
- Click “Global” tab
- Go to “Custom Logo” and upload your photo
- Be sure to hit “save"
Advisor Contact Information and Advisor Image:
- Click “settings” on the left side
- Click “Advisor” tab
- Show Advisor info - select "ON" and input information
- Be sure to hit “save"
Custom URL: To send your clients a customized login link for Orion (it'll have your logo) copy the "Custom Site URL" link in the upper right hand corner in the Client Experience App. You can use this link to send to clients, rather than the normal Orion login site that you normally use as an advisor.
Creating Client Logins
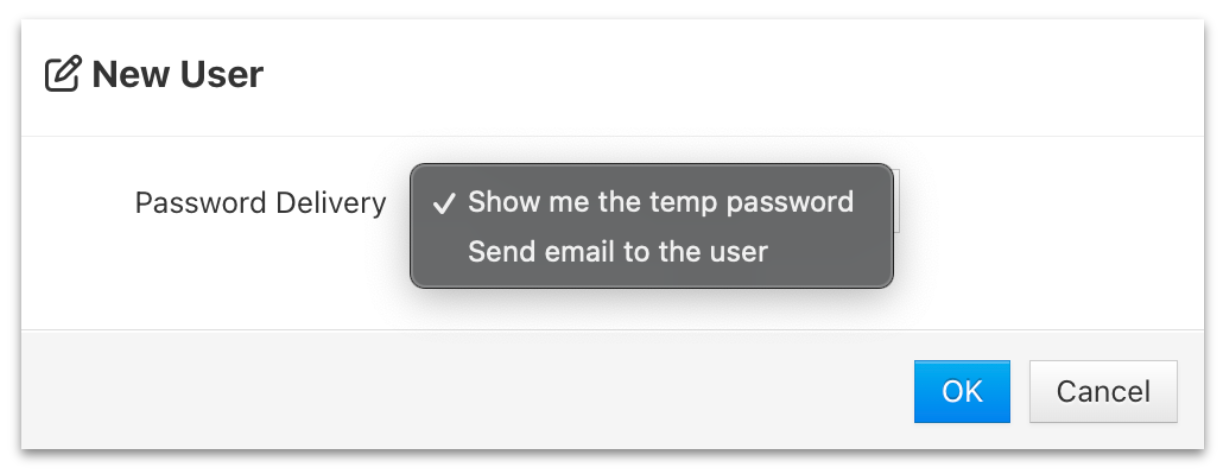
Single Client Login - Navigate to the Manage Users app > Clients tab > Click Actions and select New User.
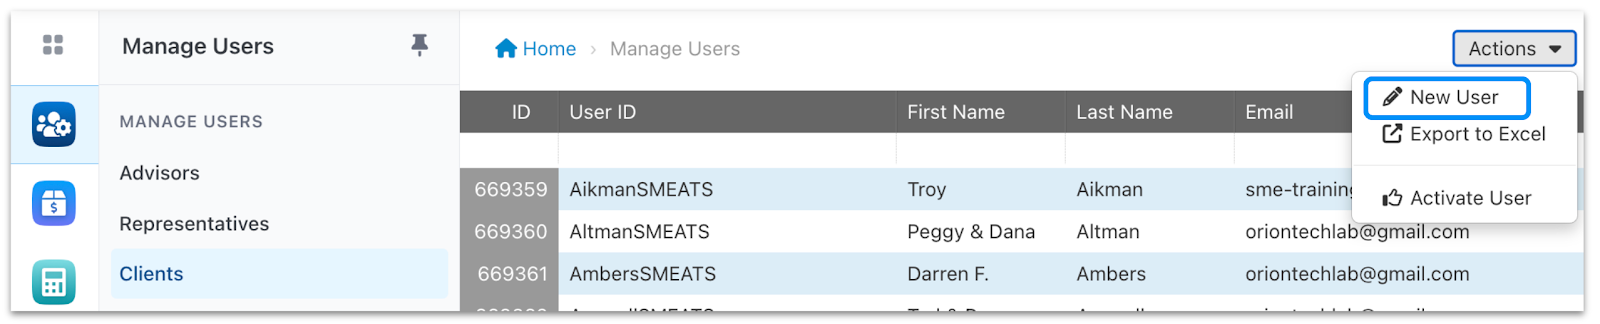
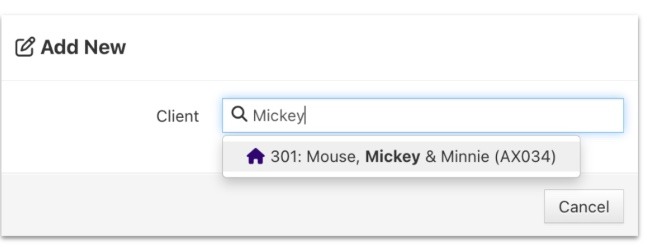
- Enter the name or Household ID of the client you are creating login credentials for, and click on the household in the dropdown menu
- Enter the Client User Information by entering the Client’s User ID, First Name, Last Name, Email, and more. Keep in mind that the User ID must be unique to all of Orion (duplicate User IDs are not permitted). Orion recommends using the User’s email as the User ID since it’s unique and easy to remember.

|
|
|
Updating clients en masse - follow instructions within this article.
- Make clients aware of their new Client Portal. Visit https://orion.com/advisor-tech/client-portal and scroll down to FREE Templates for Your Success to download customizable marketing materials, including email announcement templates, slide decks, a fact sheet, a checklist, and more!